Custom Solder On! Badge AddiKit (50pc Kit)
Custom Solder On! Badge AddiKit (50pc Kit) - Blue PCB with White Silkscreen is backordered and will ship as soon as it is back in stock.
Delivery
Delivery
Ships Same Day if Ordered Before Noon Pacific Time

Custom Solder On! Badge AddiKit (50pc Kit)

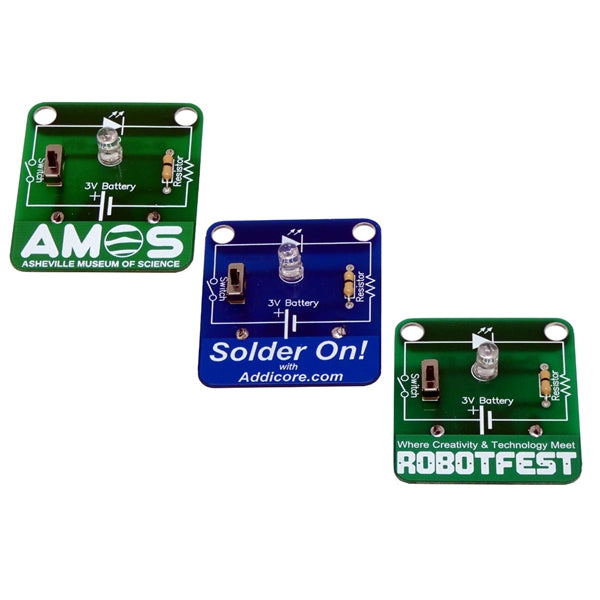
Would you like to have your own custom version of our Solder On! Badge AddiKit?
Perfect for schools, Maker Fairs, Scout events, and more!
Once you place the order, send us your logo in Adobe Illustrator or SVG format. We will then process your artwork and send you a proof for your approval.
The standard turnaround time for custom badges is 3-4 weeks after the artwork is approved.
When assembled and turned on, the LED will fade and flash through multiple colors. The badge can be turned off to save battery.
Looking for a custom shape? Addicore can create other shaped boards for an additional cost. Contact Us for more information.
Note: This is a self-assembly electronics kit which requires soldering. Free shipping is not applicable for this custom kit due to lithium battery shipping regulations.
If you are looking to place a repeat order for a badge design you have previously purchased, please Contact Us before placing your order.
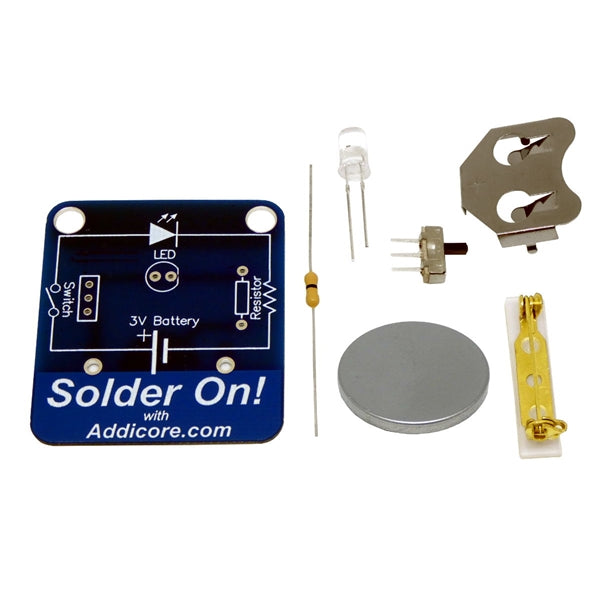
AddiKit Contents
- 1 - Solder On! printed circuit board customized with your info
- 1 - Fast color changing RGB LED
- 1 - Through hole resistor
- 1 - Switch
- 1 - 2032 Coin cell battery holder
- 1 - 2032 Coin cell battery
- 1 - Pin back with double sided tape
Customizable Areas
(Click on image to view full size)

Assembly Instructions
- Step 1 - Install and solder the LED. Make sure that the flat side of the LED (cathode) matches up with the flat side of the component outline on the board
- Step 2 - Install and Solder one resistor
- Step 3 - Install and Solder the switch. Move the switch to the down position to set it in the off mode
- Step 4 - Install and Solder the battery holder on the back side of the board making sure to match the shape of the component with the white outline on the board
- Step 5 - Install the battery by sliding it all of the way into the battery holder
- Step 6 - Install the pin back by removing the protective paper covering the double-sided tape and stick it on the back of the board centered in the silver pad
- Step 7 - Turn on the switch. Your Solder On! Badge is complete!